Loading...
Loading...
The Acerra Spaceport was humanity's last great engineering achievement before the ARC invasion — a massive launch complex built to send Exodus shuttles beyond Earth's atmosphere. Now it stands abandoned, its towering gantries and launch pads scarred by orbital bombardment and overrun by ARC machines. The wide-open tarmac areas and long corridors of the terminal buildings create a map that rewards versatile loadouts and tactical positioning.
The Spaceport is divided into three distinct zones: the Terminal Complex, the Launch Pad sector, and the Cargo Warehouses. The Terminal Complex features long hallways, security checkpoints, and lounge areas with moderate loot density. The Launch Pad sector is the most dangerous area, dominated by open ground and the towering remains of launch gantries where Rocketeers and Bastions patrol in force. The Cargo Warehouses on the western side offer dense crate spawns and workbenches but attract heavy player traffic.
Squads who understand the Spaceport's flow can exploit the clear zone boundaries to control engagements. The tarmac between the Terminal and Launch Pads is a no-man's-land best crossed quickly using abandoned vehicles and blast barriers for cover. Extraction timers at the Spaceport tend to be slightly longer than other maps, meaning you need to hold your ground during the most vulnerable moments. Bring a well-rounded squad with both long-range and close-range capabilities.
Extraction at the southern end of the main runway. Completely exposed with no cover for the final 50 meters. Fast runners only.
Departure gate extraction inside the terminal building. Good interior cover and multiple approach routes make this a solid choice for squads.
Large warehouse door extraction on the western perimeter. The cargo containers provide excellent cover, but ARC Turrets are often deployed nearby.
Extraction atop the air traffic control tower. The climb is treacherous and the rooftop is exposed, but the long sightlines let you see everything coming.
Extraction near the fuel storage tanks east of the launch pads. Explosive barrels nearby add environmental danger but also tactical opportunity.
The primary launch pad with a partially intact Exodus shuttle. High-tier military loot spawns around the gantry base. Bastion patrols make this area extremely dangerous.
Locked operations center requiring the Spaceport Access Card. Banks of old computers and sealed lockers contain rare electronic components and weapon mods.
The old terminal food court now serves as a mid-map loot hub. Tables and counters provide improvised cover during the frequent firefights that erupt here.
The largest warehouse in the complex, stacked with shipping containers and supply crates. Dense loot but also dense player traffic. Check your corners.
Underground bunker beneath the launch pad designed to withstand rocket exhaust. Now serves as a defensible position with limited entry points and moderate loot.
Tallest structure on the map. The top floor provides unmatched overwatch of the entire Spaceport but is an obvious sniper magnet with limited escape routes.
Aircraft maintenance hangar with intact workbenches and tool stations. A prime crafting location with decent cover, though Ticks nest in the ventilation system.
The wreckage of a failed Exodus launch scattered across the northern tarmac. Loot spawns randomly in the debris field, but the open ground is extremely risky.

Tiny spider-like ARC machines that cling to walls and ceilings, waiting to ambush unsuspecting players. When a target passes below, they leap onto the head and detonate. Individually fragile but terrifying in dark interiors where they hide in clusters.
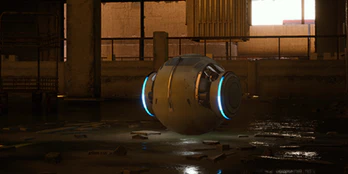
Small rolling explosive ARC balls that rush toward detected players and detonate on contact. Their spherical design allows them to roll at surprising speed across flat terrain. The explosion radius is larger than their tiny size would suggest.

The most common ARC enemy in the game. Wasps are basic flying drones armed with a rapid-fire gun that deals steady chip damage. They appear in nearly every encounter and are often the first ARC a new player faces.

Rolling flamethrower bots that patrol in groups and spray fire at close range. Fireballs are squat, ball-shaped machines with an extending flame nozzle. Their white-hot core is normally shielded but becomes exposed when they attack.

Scout drones (also known as Spotters) that fly at high altitude scanning for players. Snitches are not directly dangerous but their true threat is revealing your position to every other ARC in the area. Letting one live can turn a quiet looting run into a swarm fight.

A flying ARC drone that spews fire from above, adding aerial pressure and forcing vertical awareness. The Firefly is very aggressive and hard to shake once it locks on. It typically patrols alongside Wasps or Hornets, though it sometimes appears alone. Added in the Shrouded Sky update, it thrives during Hurricane conditions where low visibility makes its flame attacks even more dangerous.
A heavily armored ground-based ARC that rolls at high speed like a Fireball, but far more dangerous. When a Comet spots a Raider, it locks on and charges at them, splitting open its armor to reveal an explosive core before detonating with a devastating seismic boom. It breaks defensive setups and punishes static play. Added in the Shrouded Sky update.
Flying ARC drones with electric shock attacks that stun players on hit. Hornets are semi-plated aerial units that hover aggressively and close distance to deliver debilitating electric discharges. Getting stunned by a Hornet in a firefight is often a death sentence.
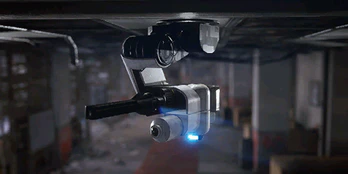
Stationary gun emplacements found inside buildings and fortified positions. Turrets are unarmored and relatively fragile, but their rapid-fire output and placement at chokepoints make them surprisingly lethal to players who rush in without checking corners.
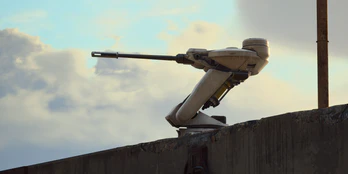
Heavy stationary sniper turrets usually found on rooftops and elevated positions. Sentinels deliver devastating long-range shots that can chunk most of a player's health in a single hit. Their distinctive yellow canister on the arm is their critical weak point.

Large spherical rolling ARC machines that patrol zones with a powerful laser weapon. Surveyors are heavily built balls of metal that roll along routes, stopping to fire a precision laser beam at detected players. Their armor is formidable except when they open up to fire.
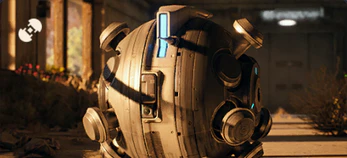
Fully plated ball-shaped ARC machines that roll at high speed to crush players. Rollbots are heavily armored from all angles while in ball form, making them resistant to sustained fire. Their primary attack is simply rolling over you with tremendous force.
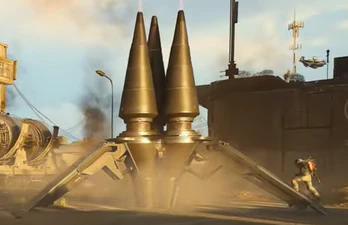
Siege-class ARC machines that fire mortar rounds in devastating barrages. Bombardiers are tall, heavy units that rain explosives from a distance, making them extremely dangerous in open areas. Their yellow leg joints and rear canister are the key weak points that experienced players target.

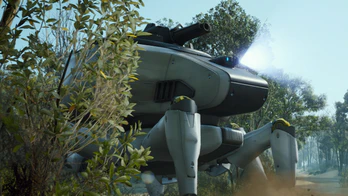
Siege-class 4-legged ARC tank with a massive turret mounted on top. Bastions are walking fortresses with heavy frontal armor and a powerful main cannon. They are among the most imposing non-boss enemies in the game and require focused team fire to bring down efficiently.
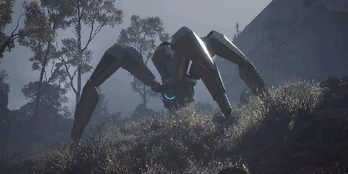
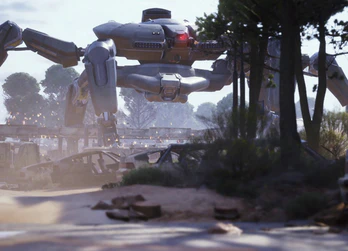
Assault-class ARC machine (also known as Bison) that leaps extraordinary distances and releases a kinetic energy shockwave on landing. Leapers are large, powerful units that close gaps instantly with their signature leaping attack, making distance and cover much less effective against them.
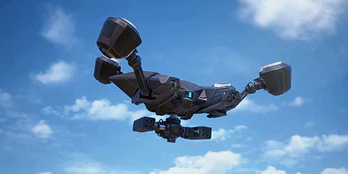
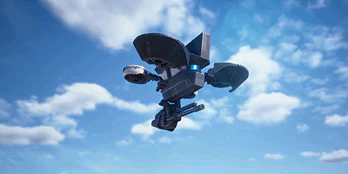
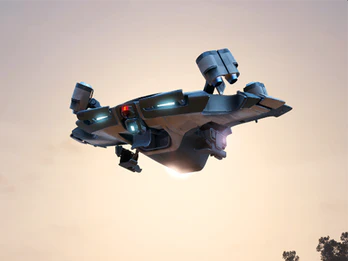
Aerial heavy weapons platform armed with a devastating rocket launcher system. Rocketeers are large flying ARC machines that hover above the battlefield and rain rockets down on player positions. Their size and altitude make them hard to miss but their HP pool demands sustained fire.
Apex-class ARC machine also known as the Harvester. The Queen is a gigantic robot that appears during the Harvester event. She towers over the battlefield and requires coordinated squad effort to defeat. Her massive health pool and devastating attacks make her the most iconic boss encounter in ARC Raiders.
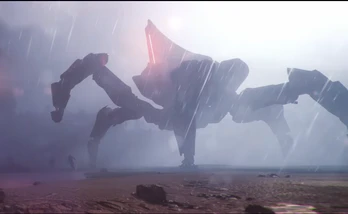
Apex-class ARC machine and the deadliest boss in the game. The Matriarch projects an energy shield that blocks all incoming projectiles and has the ability to summon waves of ARC reinforcements. She only spawns during Matriarch events on Dam Battlegrounds, Blue Gate, and Spaceport. She NEVER appears on Stella Montis or Buried City.
A terrifying aerial ARC machine introduced in the Flashpoint update. The Vaporizer combines the speed of a Rocketeer with a Matriarch-grade energy shield and precision laser attacks that will obliterate your shield and set you on fire in under two seconds. It patrols the airspace around ARC Operations and Close Scrutiny events. Killing it drops the Vaporizer Regulator required to craft the Dolabra energy shotgun.
An unarmed ARC machine with a powerful thruster system that regularly descends from orbit to collect air and soil samples. The Assessor is a large stationary ARC unit that lands during the Close Scrutiny ARC Operation. It does not roam — it holds a fixed position, surrounded by heavy ARC patrols including Vaporizers. While unarmed, breaching its 3 sections triggers deadly ARC reinforcement waves. Contains high-tier loot including ARC Powercells, ARC Alloy, ARC Circuitry, and the coveted Assessor Matrix.
Spaceport is one of the high risk-difficulty zones in ARC Raiders, featuring 5 extraction points, 8 named POIs, and a High-Tier loot tier. This is a high-stakes map — Raiders pushing this zone can pull top-tier weapons, augments, and crafting components, but the ARC patrols are denser and the rat traffic at extracts is brutal. Bring at least Medium shields, full ammo, and a teammate if you can.
The most reliable extraction routes on Spaceport run through Runway South, Terminal Gate B7, Cargo Bay Door (and 2 other extracts depending on your spawn corridor). Extract camping is the single biggest threat on this map — file a bounty on our bounty board if a rat catches you at the loadout screen, since named extracts are predictable hot spots for ambushers. Prioritise running with weapons that match your engagement range: a mid-range workhorse weapon to handle ARC patrols efficiently. See our weapon tier list for current Nomadic Envoys patch 1.29.0 meta picks.
Notable POIs include Launch Pad Alpha, Mission Control, Terminal Food Court, Cargo Warehouse 3 and 4 more landmarks scattered across the map — each one rotating between loot, ARC spawns, and PvP hotspots depending on the patrol cycle. Spaceport hosts 20 confirmed ARC enemy types, including Tick, Pop, Wasp and 17 other variants. Check each enemy's weak points before you push — burning through a magazine on body shots is the fastest way to draw every rat in the zone.For real-time intel on rat activity, betrayer reports, and live danger zones, scan the community zone map before queueing in.
No active reports for this zone.